salt & pepper cookies
It doesn’t cease to amaze me that while I am never late for dinner, an appointment, or even a party (fashionably late, what?), I can’t for the life of me meet my own deadlines. There’s a lemon tart that I’ve got for you in the next few weeks that was made nearly a year ago, but because I had missed the citrus season was tucked away for the year, leaving me with pangs of guilt. It’s coming, I promise, sometime mid-January. And while I also promise to throw some less waist-challenging fare your way, I firmly believe in indulging, if only a little, around the calendar. I will also try not to be tardy on my own blog. That, perhaps, might be my only New Year’s resolution.
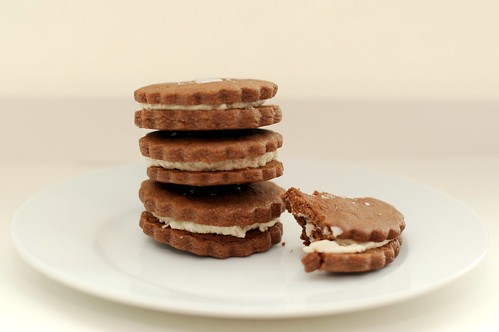
While offering cookies after Christmas is a little bit like responding to a party invite a day after the party took place and promising to make something for it, I’m going to stick my neck out and tell you about these cookies after all. They’re good, very good indeed, and if you are looking for something festive-looking to usher in the New Year, look no further. They’re as sophisticated as cookies get, dressed up in black and white, toothsome, laced with white pepper. They are an adult, black-tie version of the Oreo, an Oreo that at the same time, kind of wants to be a whoopie pie. It’s made for a decadent feast, but then again, who’s ever wanted to have a humble New Year’s party?
And thus we’ve arrived at the real reason that I’ve been so late with this post: I’ve been thinking of a good way to describe this cookie last week. Perhaps being in Boston over the holidays steered my mind away from writing to family and friends, and a few projects of my own. Also, and Dad, I am looking at you – keeping the house at sixty-four degrees Fahrenheit, does not inspiration make. The only one in the house who wasn’t cold was the cat. I wore a hat while I worked. Seriously.
This recipe is the third one that I’ve made from the new Baked book, and you can see here that I’m quite taken with it. The recipes are fantastic and inventive, at once nostalgic and new. I want to go through the book and just make one thing a day, and Lord knows I’ve enough butter to last me through a few months! But, oh but you knew there was going to be a but, and this is where I want to take some tape and seal my mouth shut, or, as my sixth-grade teacher, Mrs. Sledge, used to say “staple my lips together” – because I’m the kind of person who, once something bothers her must just be out with it, because otherwise it’ll fester and she’ll just whine and whine and whine about it. And that’s no fun.
So here it goes. I wanted more tips. Tips on the fact that the dough was going to become rock hard in the refrigerator, and until I beat it (yes, beat it) with a rolling pin, it didn’t budge. Tips on how the dough was not just sticky, but probably the stickiest dough I’ve ever encountered. I made three batches, folks, and yes, it was sticky every time. Those tips would have helped me a lot, and I would’ve saved myself a lot of time in the process. Also because sticky dough does not, repeat does not, want to part with the counter. As a result you get ugly, misshapen cookies. Cookies that look nothing like they do in the book they also grace the cover of! And after you glance and see just how stunning and immaculate those cookies look, anything other than perfection would probably make you feel like a novice baker, or worse – like you did something wrong. I think, at least I hope, that my suggestions below help to fix these issues. The recipes are pure gold, I think, but for someone like me, a few extra tips are always welcome. And so I share them with you here, hoping that you will find them helpful and that they’ll save you a bit of head scratching. Rant over.
So I hope you will consider making them for your New Year’s soiree, and I also hope that you’ll treat yourself to a cookie or two in the month of January. Maybe December was a bit of an overkill, but sometimes overkill is exactly what is needed. 2010 has been an intense, amazing year – December was its celebratory month. Starting in January, I’m back to practicing moderation, or at least resolving to. Maybe that will make a good New Year’s resolution – expect no absolutes, give yourself a break; strive for the best, but cut yourself some slack; be grateful, be joyous, be present. Happy New Year, everyone, and once again, thank you for coming here and sharing this space with me. See you in 2011!
Salt & Pepper Sandwich Cookies
Adapted from Baked Explorations
Ingredients:
For the Cake:
3 ½ cups all-purpose flour
¾ tsp salt
¼ tsp fleur de sel, plus more for decorating
2 tsp white pepper
½ cup dark unsweetened cocoa powder (I used Scharffenberger)
1 ½ cups (3 sticks) unsalted butter, cut into 1-inch cubes, cool, but not cold
1 cup granulated sugar
1 ¾ cups confectioners’ sugar
3 large egg yolks
1 tbsp pure vanilla extract
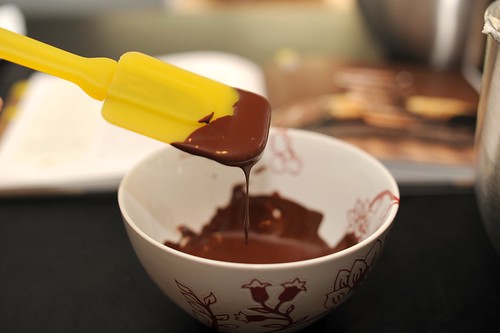
3 oz good-quality dark chocolate (60-72% – I used 70% Scharffenberger), melted
For the Filling:
5 oz vegetable shortening, at room temperature
4 tbsp (1/2 stick) unsalted butter, cut
3 ¼ cups confectioners’ sugar, sifted
½ tsp salt
1 tbsp pure vanilla extract
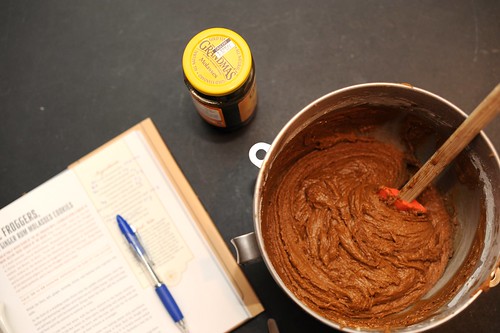
1 tsp light rum
Preparation:
To Make Cookies:
In a large bowl, mix the flour, salt, fleur de sel, white pepper, and cocoa powder, using a whisk, and then aerate the dry ingredients. Set aside.
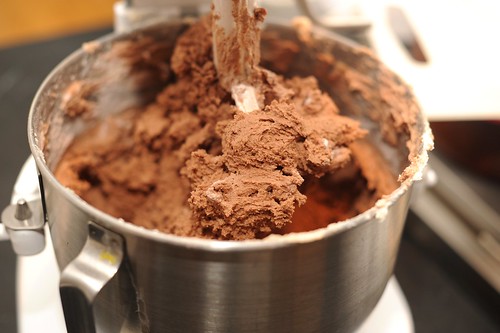
In the bowl of a standing mixer, fitted with a paddle attachment, beat the butter and both sugars together until light and fluffy – about 3 minutes or so. Scrap down the blow, add egg yolks, one at a time, beating until each is incorporated into the mix. Add the vanilla extract, then melted chocolate, and beat until uniform in color. Using a spatula, scrape down the sides (and bottom!) of the bowl, add the remaining dry ingredients and mix until just incorporated. [When adding dry ingredients, I recommend starting the mixer on the lowest speed possible, to create the least amount of mess.]
Loosely shape the dough into two balls, wrap them tightly in plastic, and refrigerate for at least 3 hours, but I gave mine an overnight rest.
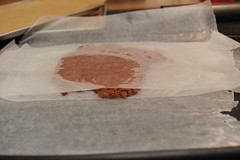
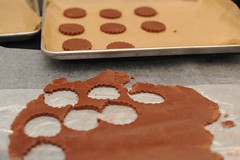
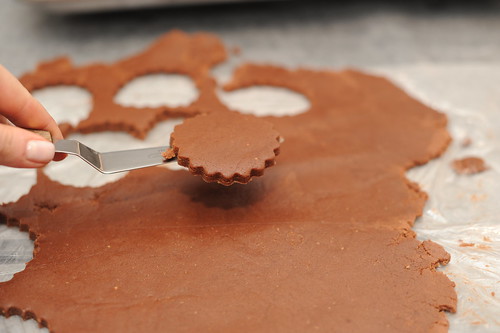
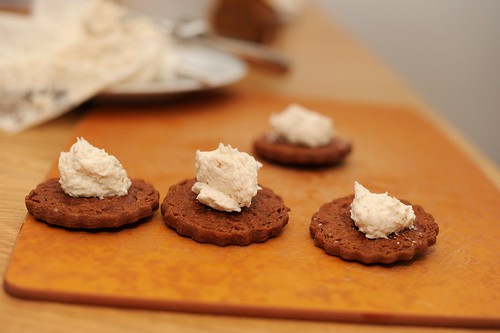
Preheat the oven to 350 degrees F. Line 2 baking sheets with parchment paper. Unwrap on ball of dough, but maintain the plastic on it. Give the ball about a 40 minute rest on your counter. Mine was rock hard. It’ll feel rock hard after those 40 minutes too, but you can beat it (um, yes, beat it) with a rolling pin to smush it down. Sprinkle some flour all over the disk – not a tiny dusting, but not a voluminous amount either. Get a few large pieces of wax paper and put them on top and bottom of the now-flattened disk. With the top of the plastic wrap still on the dough, roll the dough out, using the rolling pin (now the dough is between sheets of wax paper) to about ¼ inch thickness. [The book notes that the dough will be slightly sticky. Mine was insanely sticky, downright impossible to work with. The wax paper solution fixes all of that AND prevents a royal mess in your kitchen.] Anyway, using a 2-inch round cookie cutter, prepare your sandwich tops and bottoms, and transfer them to the prepared baking sheets, leaving at least a 1 ½ inch space (2 inches will be better). HELPFUL TIP: Use a small frosting spatula to lift and transfer the unbaked cookies to the baking sheet. Continue the cookie cutting process with the remaining dough – and extra dough scraps can be re-chilled and rerolled again.
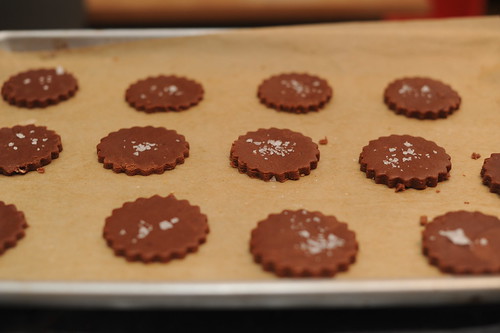
Sprinkle the tops of cookies with a little fleur de sel, then bake them for 10-12 minutes, rotating the sheets halfway through the baking time. The tops of the cookies should look a bit dry, and possibly cracked. Place the baking sheets on wire racks to cool for 5 minutes, and then, using a spatula, transfer the cookies to the racks to col completed before filling them.
To Make Filling:
In the bowl of a standing mixer fitted with the paddle attachment, beat the shortening with the butter until it is smooth and lump free. Add the sugar, in 3 parts, mixing each part until just incorporated. Add the salt, vanilla, and rum and beat again for 10 seconds. The filling should be thick but spreadable (like Oreo filling). If it’s too thick, add a drop or two of water, if you like. If, however, your mixture is too thin, feel free to add a few spoons of confectioners’ sugar to achieve the right consistency.
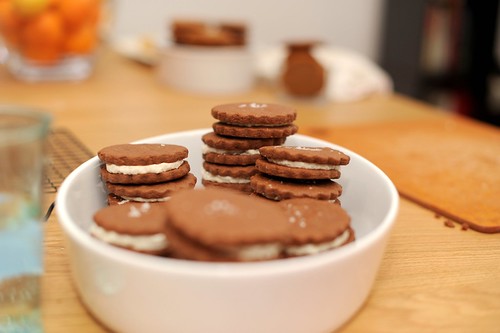
Using a small spoon, like the tiny cookie scoop, apply about 2 tablespoons of filling to the flat side of the cookie. Place another cookie, flat side down, on top of the filling and press down slightly to allow the filling to spread all over the center to the outer edges. Repeat until all the cookies are made.
the blissful baker
wow, what a unique recipe! i would never think to use salt AND pepper in a cookie, but it looks great!
Melanie
This is really interesting! I’ve never heard of salt and pepper cookies. 2 tsp of pepper is quite a lot of pepper :) I’ve got to try this one!
MizDahlia
“…expect no absolutes, give yourself a break; strive for the best, but cut yourself some slack; be grateful, be joyous, be present.” What beautiful words to carry into 2011. Yes!. And the cookies look fantastic too :). Happy New Year, Olga!
Kate
It looks like one could go right ahead and use the leftover hard sauce for the filling :) They look good!
Jessica @ Delicious Obsessions
What a clever idea. The recipe looks really good – I think I’ll give these a try!
Brian @ A Thought For Food
I’ve been seeing recipes from this cookbook over the past couple of months and this one has pushed me to buy it. This is just my kind of cookie. Sweet, salty… and a little peppery kick.
Dana
How novel! I bet that these are great, though it’s too bad that the dough is hard to work with.
Radish
Dana – the dough is EASY, if you follow my tips :) Seriously!